Grid Manipulation: Exploring New Possibilities in Lace Design
In lace making, patterns are usually created by changing the stitches that go on the grid. I recently started wondering—what would happen if I manipulated the grid itself? Could I push and pull the structure of the grid and still see recognizable shapes in the finished lace? This curiosity led me to an exciting experiment I’ve started calling grid manipulation.
The Concept: Manipulating the Grid, Not the Stitches
Typically, when I design a lace pattern, I start with an isometric grid and then figure out which ground stitches and features (like spiders) to include. For this experiment, I placed black dot, pinpoints, on an isometric grid and ran it through Adobe Photoshop using the liquify tool. The liquify tool allowed me to distort the grid, moving the stitches along with it.
Combining Digital Tools with Traditional Lace Techniques
Since I’ve been working with Adobe products for years, it wasn’t a huge leap to experiment with digital manipulation in my lace designs. I initially started designing patterns in Adobe Illustrator, where I could make every detail perfect and create symbols for specific stitches. These days, I design mostly in Procreate on my iPad, so experimenting in Photoshop with the liquify tool felt like a natural next step.
Pinch, Push, and Patterns: How the Grid Manipulation Worked
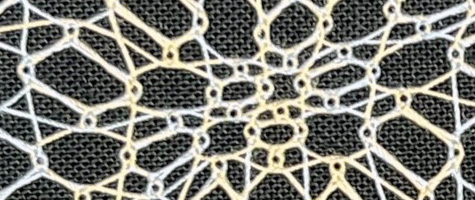
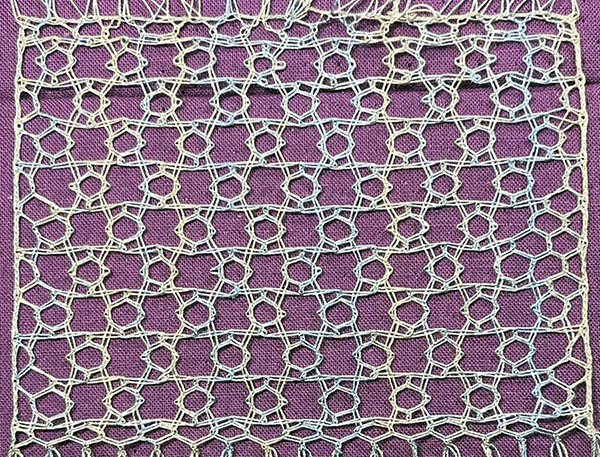
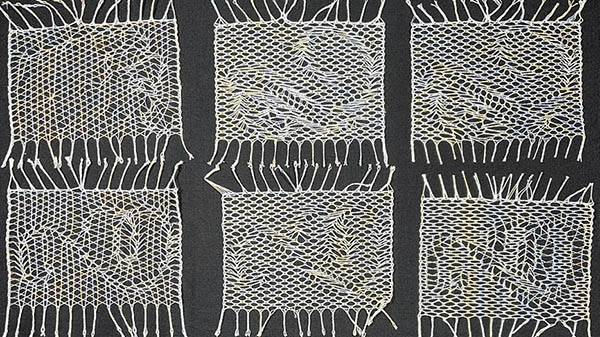
One of the first things I tried was a rose ground stitch on a regular isometric grid. It was a familiar sight—clean, neat, and symmetrical. Then, I used the liquify tool’s pinch effect to manipulate the grid, and the design was transformed! The pinched grid created clusters of stitches that looked like flowers or fireworks, depending on how you looked at it. The results were exciting and unpredictable.
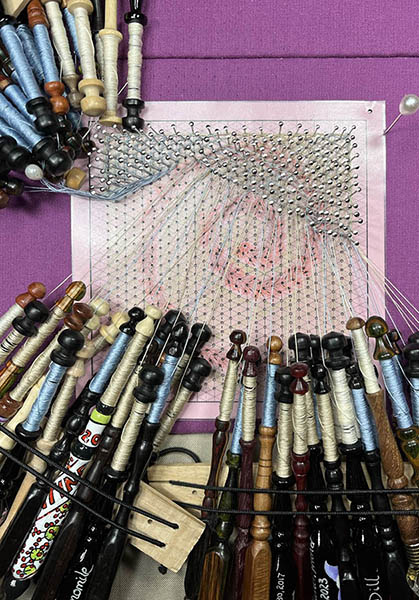
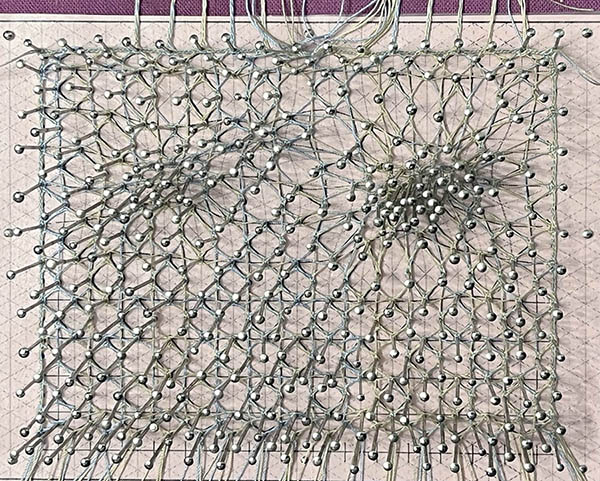
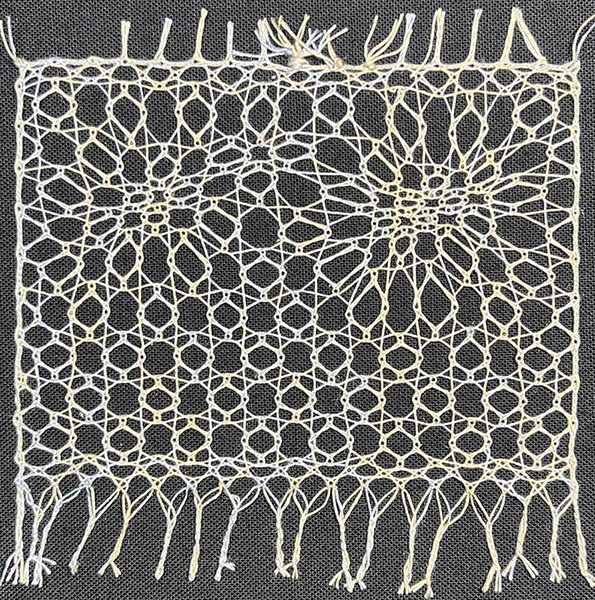
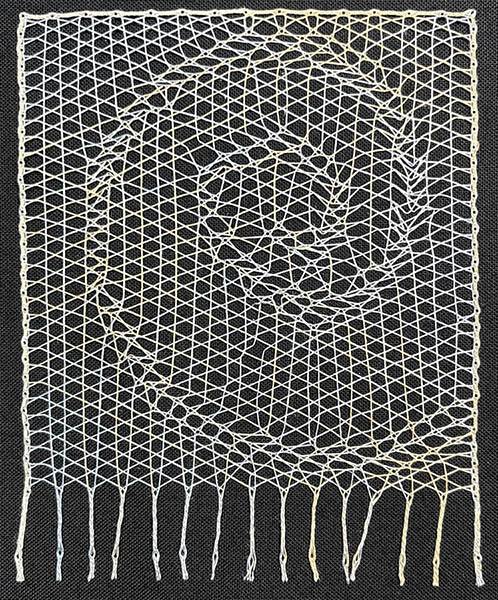
Next, I moved on to the liquify-push effect. I layered a spiral image underneath the isometric grid and pushed the grid around on my touch screen, following the spiral pattern. The final result was an abstract design that had an entirely new sense of movement.

What Worked and What Didn’t
Throughout this process, I learned that some stitch combinations worked better than others. Stitches with more twists held their shape better when there was more distance than usual between the pin-points. The pinch effect worked especially well with the rose ground stitch, since it had such a distinctive look. It made the most sense to use the push effect with spirals and simpler filigree designs, but more complicated patterns tended to lose their shape when the grid was distorted too much.
The Future of Grid Manipulation in Lace
While this was an experiment, I’m excited by the possibilities that grid manipulation opens up for future lace designs. The ability to digitally manipulate the grid itself gives me new creative freedom to explore shapes and effects that wouldn’t be possible with traditional methods alone. I can’t wait to see how this technique evolves and how I might incorporate it into future lace projects!
Want to See the Results?
If you want to see grid manipulation or other lace making in action, check out my social media. Follow me on Instagram (@BobbinLaceNet) or TikTok (@CajahYupMe) to stay updated on my latest lace-making adventures and see more behind-the-scenes looks at my creative process.