Wire Lace Sample: Exploring New Materials for Sculptural Lace
After spending some time touring outdoor art installations around Denver with my dad in May, I felt inspired to try my hand at creating a sculptural outdoor installation. There are so many materials I could have used, but I decided on wire, hoping it would hold up well in an outdoor environment. This project was an experiment with bailing wire, and while I ran into some challenges, it’s opened up some exciting possibilities for the future!
Gathering Supplies and Setting Up
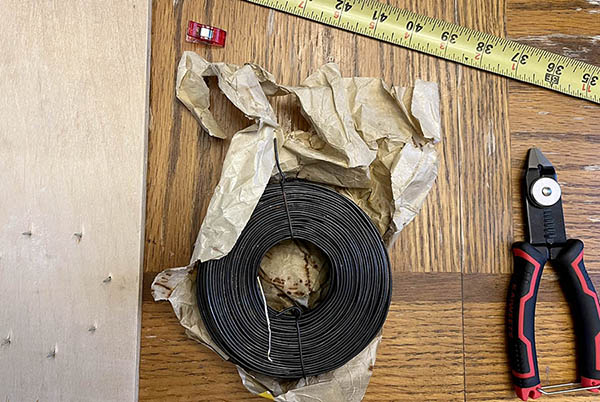
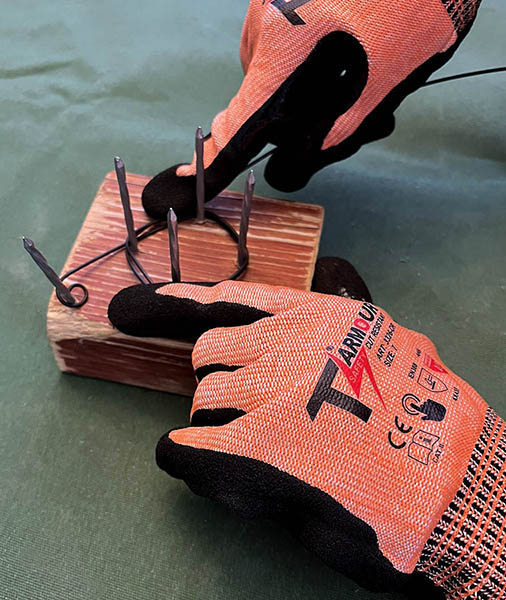
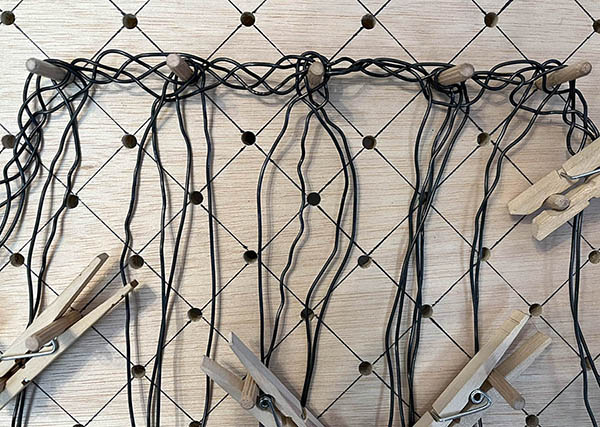
For this project, I gathered the usual lace-making supplies—except this time, I substituted thread for bailing wire. I used wire snips, a measuring tape, and the same rotating board I used for my piece currently on display at the Denver Art Museum, Pickup at Store #5. My initial plan was to make coils of wire using a board and nails, but the coils kept getting tangled. Fortunately, my husband stepped in and made some large bobbins, which helped me manage the wire more easily.
The Challenge: Wrestling with Bailing Wire
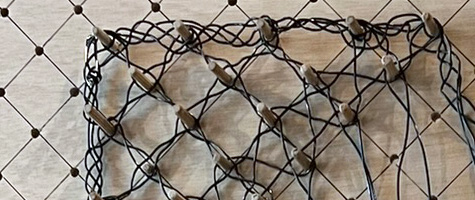
Working with bailing wire was an entirely different experience compared to my usual lace materials. Normally, I’m comfortable working with non-traditional materials like grocery bags, but bailing wire felt like I was wrestling with it! The wire is annealed, which means it’s strong, flexible, and pliable due to a heating and cooling process during its manufacture. However, the more I manipulated it, the more kinked it became, and I found myself struggling to keep control of the lace.
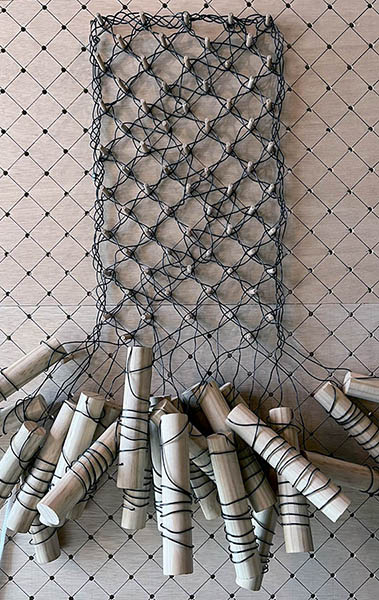
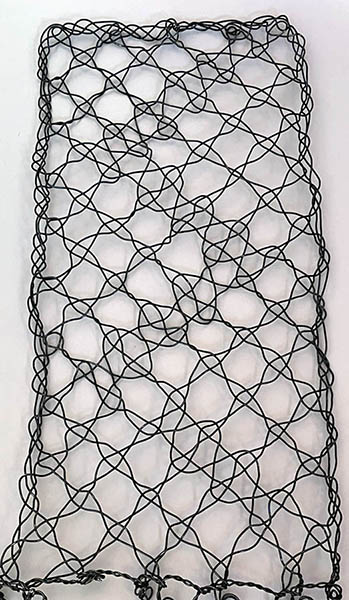
One interesting aspect was that the wire stayed in place wherever I put it. There was no need for tensioning, which is usually a key part of lace-making. However, pulling the crosses and twists tight was difficult, and I ended up with more gaps than I wanted in the final piece. Despite these frustrations, I learned a lot from the process.
A Sculptural Vision for Outdoor Art
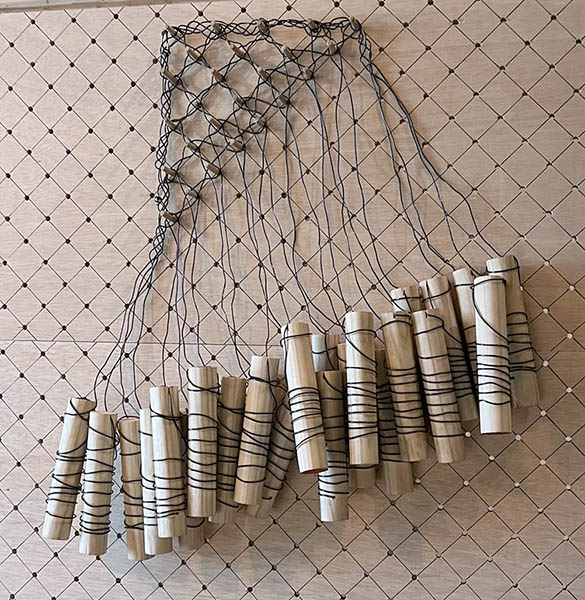
I’m still in the experimental phase, but the goal is to create a sculptural outdoor lace installation. Once I find a material that’s easier to work with, I’ll be able to see how much the lace can bend and twist without distorting. The rotating board I use for larger lace pieces has been especially helpful in this regard, allowing me to make feet of lace instead of the normal inches on a traditional bobbin lace pillow.
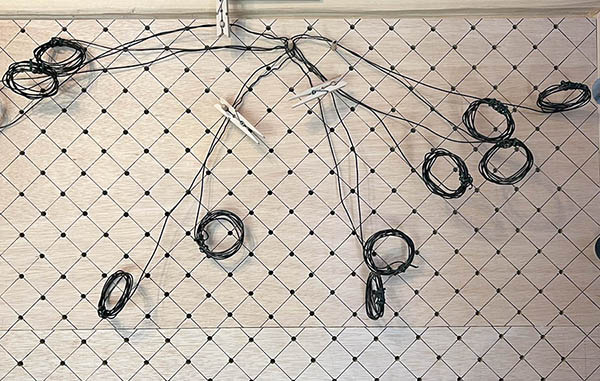
Bobbins and Wire: A Noisy Combination
The large bobbins my husband made were a game-changer—they allowed me to keep the wire from tangling on itself, which was a huge help. However, the bobbins made quite a bit of noise as they clattered against the wooden board! While the sound was a bit distracting, it’s a small price to pay for the increased control they gave me over the wire.
What’s Next: Trying a Thinner Wire
This first sample has taught me that bailing wire may not be the best fit for this project, so I’ll be trying out some thinner steel wires next. These wires, typically used for hanging pictures, should offer more flexibility while still providing the durability needed for an outdoor piece. I’m hopeful that this next experiment will bring me closer to creating the kind of sculptural lace I have in mind!
Stay Tuned for More Experiments
This is just the beginning of my journey into creating wire lace for outdoor installations. I’m excited to keep experimenting with different materials and techniques until I find the perfect combination. For more updates and behind-the-scenes looks at my work, follow me on Instagram (@BobbinLaceNet) or TikTok (@CajahYupMe).